


How To Put The Battery
How to Install a Lithium Ion Battery for Home Energy Storage: A Complete Guide for JM’s 51.2V300Ah Split Type Lithium Battery

Table of Contents
Article Summary
This easy-to-follow guide breaks down how to put a lithium ion battery into your home energy system, focusing on JM Energy Tech’s newly engineered 51.2V300Ah‑15KWH split type lithium battery—a top-tier storage home energy battery from our Dongguan, China lithium and sodium ion battery factory with a decade of manufacturing experience. We walk through every installation step, share essential safety best practices, and feature two real US family case studies that highlight how simple it is to set up this lithium ion battery, plus the long-term savings and reliability it brings to solar-powered homes and emergency backup power setups.
As a lithium ion and sodium ion battery manufacturing specialist based in Dongguan, China, with 10 years in the industry, JM Energy Tech designed our 51.2V300Ah‑15.36KWH split type lithium battery to make home energy storage simple and accessible for every household. This LiFePO4 storage home energy battery checks all the boxes: plug-and-play ease, flexible wall or floor mounting, a 6000+ cycle life, and a built-in battery management system for total safety. But to get the most out of this powerful lithium ion battery, proper installation is everything. In this post, we’ll walk you through how to put the battery into your home’s energy setup step by step, cover non-negotiable safety tips, and share two true stories from US families who transformed their home power with this split type lithium battery—no fancy technical skills required.
Why JM’s Split Type Lithium Battery Stands Out for Home Energy Storage

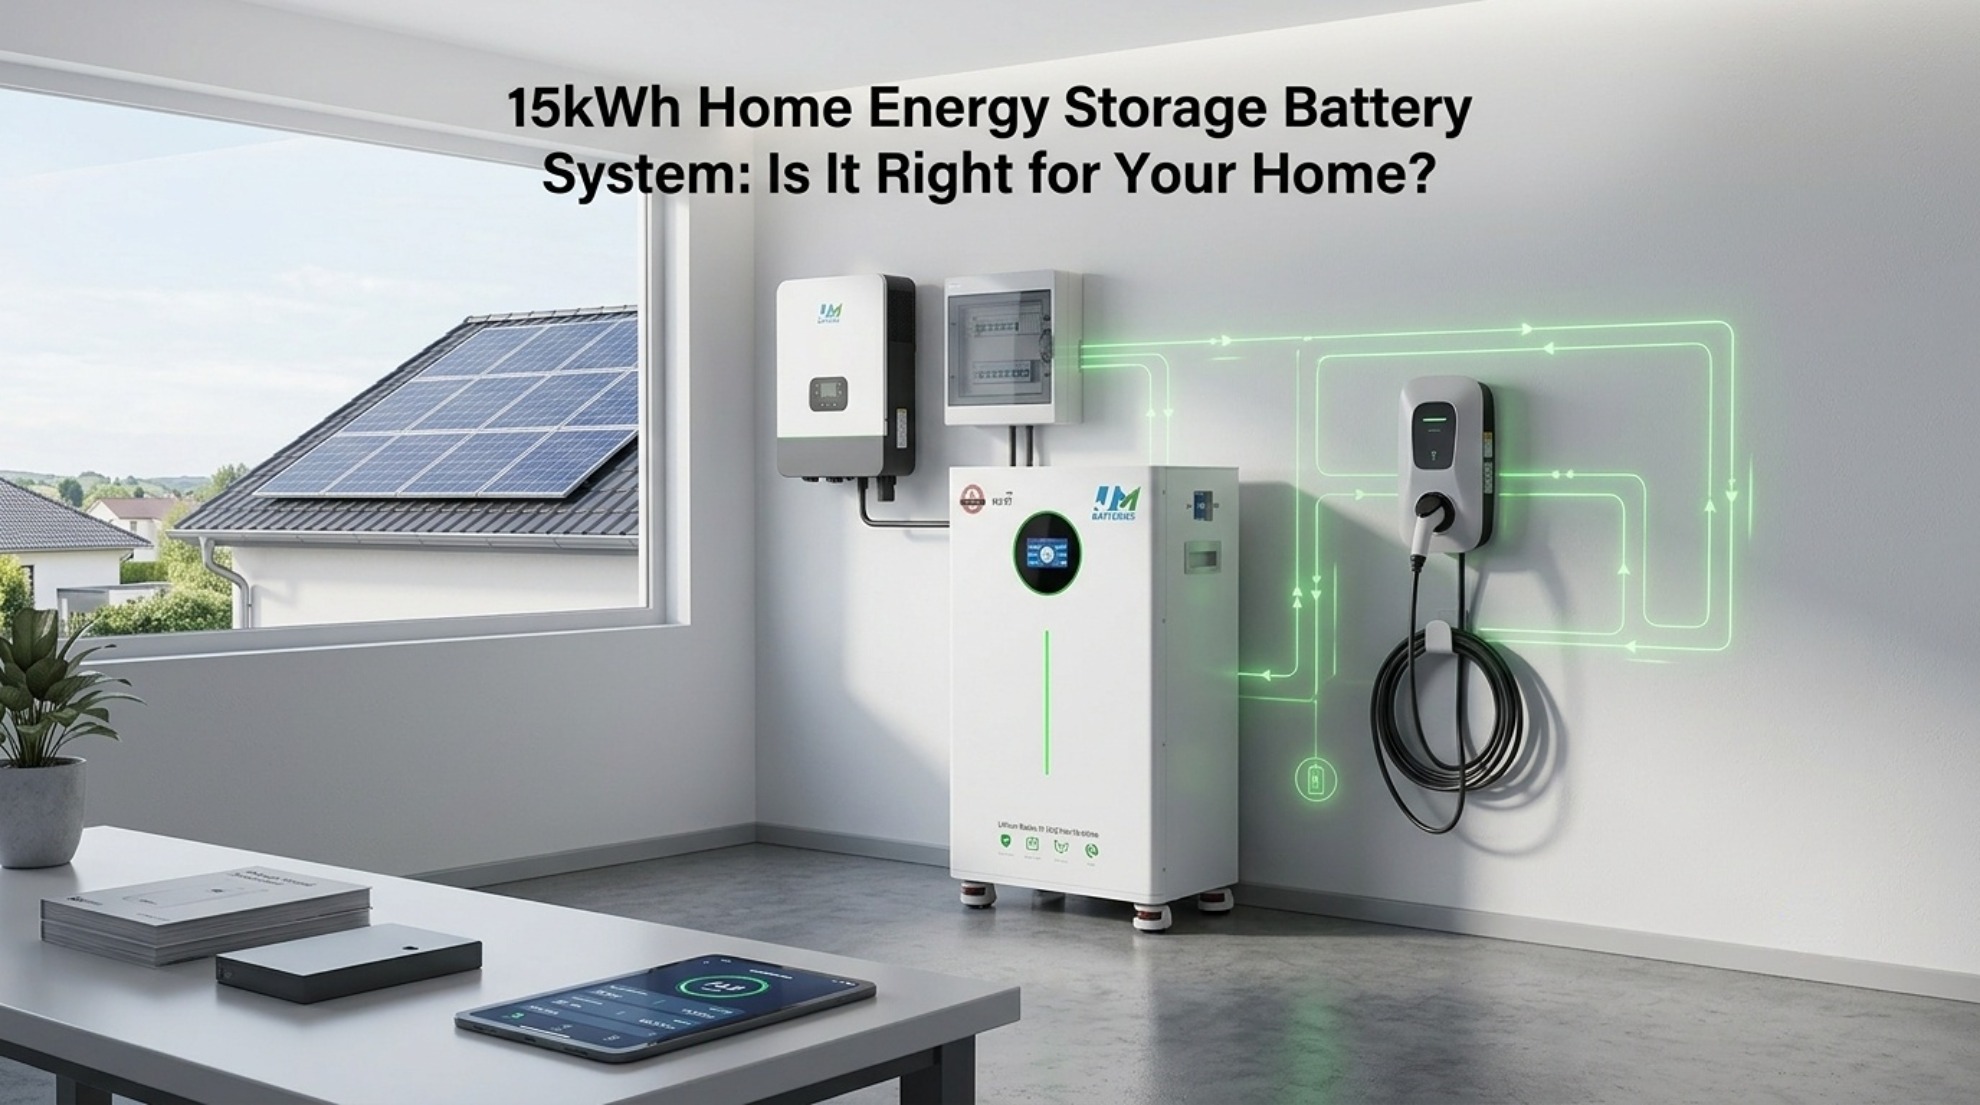
Before we dive into the installation steps, let’s talk about why this lithium ion battery is a game-changer for residential storage. As a split type lithium battery, it comes with a factory-installed JBD‑16S‑200A BMS (Battery Management System) that stops overcharging, over-discharging, and short circuits—so you never have to worry about safety or premature battery wear. It’s backed by a 10-year warranty, delivers 51.2V of power, 300Ah of capacity, and 15.36KWH of rated energy, making it perfect for solar systems, everyday household appliances, and emergency backup power.
It fits any home, too: wall mounting saves precious floor space, while floor mounting works for basements, garages, or utility closets. Add in WiFi and Bluetooth connectivity, an easy-to-read LCD display for real-time battery status, and inverter communication compatibility, and this storage home energy battery is designed for both DIY installers and professional electricians. No complicated wiring, no confusing setup—just a reliable lithium ion battery built to last.
Step-by-Step: How to Put the JM Split Type Lithium Battery in Your Home Energy System
Thanks to its plug-and-play design, installing our lithium ion battery is straightforward—even if you’re not a seasoned DIYer. Follow these steps to set up your storage home energy battery safely, whether you’re mounting it on the wall or placing it on the floor. We’ve kept it simple, just like we designed the battery itself.
Pre-Installation Prep: Safety First, Gather What You Need

Working with a lithium ion battery means putting safety at the top of your list—no exceptions. First, pick the right spot: it needs to be dry, well-ventilated, and far from heat sources (like water heaters or fireplaces) and flammable materials. Our battery works in temperatures from -10°C to 60°C, but extreme heat or cold will shorten its life, so stick to a climate-controlled area if you can. Make sure the spot can support the battery’s 126KG weight: a load-bearing wall for wall mounting, or a flat, sturdy concrete or wood surface for floor mounting.
Next, gather your tools and safety gear—you’ll need:
- Insulated work gloves, safety goggles, and anti-static clothing (no bare hands on terminals!)
- Torque wrench, Phillips and flathead screwdrivers, a level, and a tape measure
- A multimeter to test voltage and check for short circuits
- Certified heavy-duty cables and connectors (rated for 200A, matching the battery’s max charge/discharge current)
- A grounding wire (to meet US safety codes like UL 9540)
Before you start, inspect the lithium ion battery itself: check for any dents, cracks, or damage to the casing, make sure the SOC indicator light and BMS boot light turn on when you plug it in (brief test), and use your multimeter to confirm the voltage falls within the 40V–58.4V range. If something looks off, don’t install it—reach out to our support team right away.
Step 1: Mount the Battery (Wall or Floor—Your Call)
Our split type lithium battery has two installation options, so you can pick what works for your home’s layout. The battery’s dimensions are 700*520*287mm, so measure your space first to make sure it fits.
- Wall Mount: Use the included mounting bracket and hardware to attach the battery to a load-bearing wall (studs or concrete are best). Use your level to make sure it’s perfectly straight—even a small tilt can cause wear over time. Tighten all bolts with a torque wrench to avoid loose mounting; a wobbly battery is a safety hazard. This is the best choice for small homes, apartments, or garages where floor space is tight—it also looks clean and modern, blending in with your home’s design.
- Floor Mount: Place the battery on a flat, non-slip surface (we recommend anti-slip pads, which we include) and secure it to the floor if desired (for extra stability in high-wind areas or basements). Leave at least 12 inches (30cm) of space around all sides of the battery for ventilation and easy maintenance—you’ll need to access the terminals and display for checks later.
Step 2: Connect the Battery to Your Home’s Energy System
This split type lithium battery works with solar panels, grid-tied inverters, and off-grid setups—wiring it up is simple, as long as you follow polarity rules. Here’s how to do it right:
- Label Polarity: The battery’s positive (+) and negative (-) terminals are clearly marked—we even color-code them for easy identification. Never reverse polarity: this will fry the BMS and damage the lithium ion battery, and it voids your warranty.
- Inverter Connection: Use the battery’s CAN/RS485/RS232 communication port to connect it to your inverter (it supports seamless inverter communication, so the battery and inverter sync in real time). Tighten all cable connectors with a torque wrench—loose connections cause heat and power loss.
- Ground the System: Attach one end of the grounding wire to the battery’s dedicated grounding terminal, and the other end to a proper earth ground (aim for a ground resistance under 4Ω). This is mandatory for US safety standards (NFPA 855) and prevents electric shock or fire hazards.
- Test the Connection: Fire up your multimeter to check the voltage at the terminals—you should see 51.2V for idle mode (0.00A current). The battery’s LCD display will light up and show real-time voltage and current if everything is connected correctly. If you see an error or no reading, double-check your wiring—don’t move forward until it’s right.
Step 3: Activate the BMS and Set Up the Battery
The built-in BMS is the brain of this lithium ion battery, so activating it correctly is key to keeping it running smoothly:
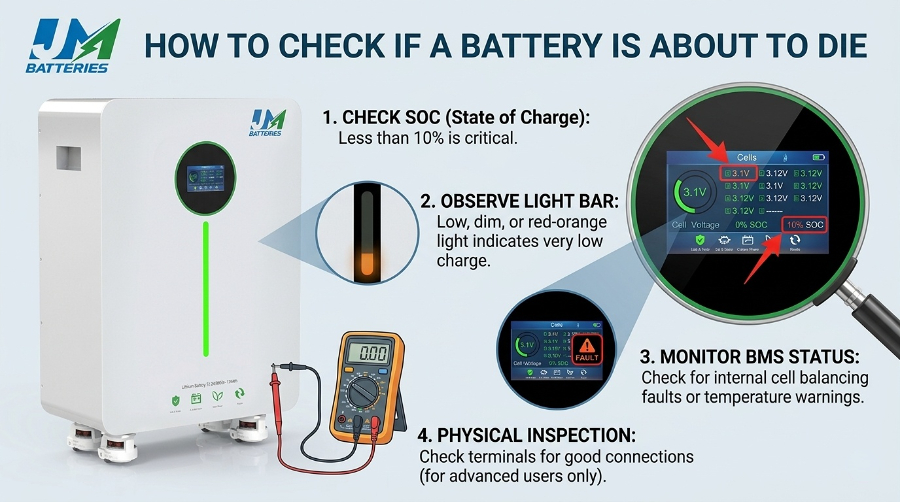
- Press the BMS boot button (located on the front panel) to turn on the battery management system. The BMS indicator light will turn green when it’s working normally—red means there’s an issue, so stop and troubleshoot if that happens.
- Use the LCD display (two screen options to choose from) to check the SOC (State of Charge), individual cell voltage, and protection status. This is where you’ll see if the battery is charging, discharging, or idle. You can also connect the battery to your phone or tablet via WiFi or Bluetooth to monitor it remotely—perfect for checking the battery level when you’re away from home, or debugging the communication protocol if needed.
- Solar Sync (If Applicable): If you have a solar panel system, sync the battery with your solar inverter through the communication port. The battery will automatically charge during peak sunlight hours and discharge to power your home when the sun goes down—no manual adjustments needed. It’s that easy.
Step 4: Final Check and Test Run
You’re almost there—now it’s time to make sure everything is working before you start using the battery for daily power:
- Do a full walkthrough: double-check all wiring, mounting bolts, and the grounding wire. Make sure nothing is loose, frayed, or touching the battery’s casing.
- Flip the circuit breaker (on the battery panel) to the “on” position. Start with small loads first—plug in a lamp, fan, or phone charger—to test power delivery. If that works, move to larger appliances: a refrigerator, microwave, or air conditioner. This tests the battery’s 200A max discharge current capacity, so you can be sure it handles your home’s needs.
- Confirm the AC output: the battery delivers 220V–240V at 50/60HZ, which matches standard US household voltage—so all your appliances will work just like they do with grid power.
If everything runs smoothly, you’re done! Your JM split type lithium battery is now part of your home energy system, ready to store solar power and provide backup energy when you need it most.
Critical Safety Tips for Lithium Ion Battery Installation (Don’t Skip These!)

We designed this battery to be safe, but these simple rules will keep it that way for years:
- Always turn off your home’s main power and inverter before connecting or disconnecting the battery—never work on a live system.
- Never touch the battery’s metal terminals with bare hands, even if it’s off—always wear insulated gloves.
- Don’t modify the battery’s wiring, BMS, or casing in any way—any alterations void your 10-year warranty and create safety risks.
- Keep the battery out of reach of kids and pets; store all installation tools in a locked cabinet when you’re done.
- If you see an error code on the LCD, hear unusual noises, or notice overheating, turn off the battery immediately and contact JM’s technical support—don’t try to fix it yourself. We’re here to help, and it’s better to be safe than sorry.
Real US Family Stories: How This Lithium Ion Battery Changed Their Home Power
To show you just how easy it is to install and use our split type lithium battery, we’re sharing two true stories from US families who made the switch to JM’s storage home energy battery. These aren’t staged—they’re real people, with real home power needs, who found success with our lithium ion battery.
Case Study 1: The Carter Family (Tampa, Florida) – Hurricane Backup Power That Actually Works

The Carters live in Tampa, where hurricane season means power outages that can last 3–5 days—sometimes longer. They had a 10kW solar panel system installed a few years ago, but without a storage battery, they still lost power when the grid went down. They needed a reliable storage home energy battery that was easy to install and could power their essential appliances: a refrigerator, air conditioner, and a CPAP machine for Mr. Carter.
They chose JM’s 51.2V300Ah lithium ion battery, and their local electrician installed it in just 2 hours—mounted on the garage wall to save floor space. The split type design made wiring to their existing inverter a breeze, and the LCD display let them check the battery level at a glance. When Hurricane Idalia hit last year, their power went out for 4 days—and their JM battery kept all their essentials running the entire time.
“We used to stress for weeks before hurricane season, wondering if we’d have power for the CPAP machine,” Mrs. Carter says. “Now we don’t even think about it. The battery is so easy to check, and we can monitor it on our phones if we have to evacuate. We also save about $150 a month on our electric bill by using solar power stored in the battery instead of grid power during peak hours. It’s been a game-changer for our family.”
Case Study 2: The Rodriguez Family (Sacramento, California) – Energy Independence From Rolling Blackouts
The Rodriguezes are a family of four in Sacramento, where rolling blackouts and sky-high electric bills are a constant frustration. They wanted to be completely independent from the grid, so they paired a 12kW solar panel system with JM’s split type lithium battery—they chose floor mounting for the battery in their basement, and they installed it themselves (with a little help from a handyman friend) in just 3 hours.
The plug-and-play design made the setup simple, and the WiFi connectivity let them monitor the battery from their living room. The 51.2V300Ah lithium ion battery stores all the excess solar power their panels generate during the day, powering their entire home—including two electric vehicles—at night and during rolling blackouts. For the past 6 months, they haven’t used a single watt of grid power.
“Our electric bill used to be $200–$250 a month, and we’d lose power at least once a month during summer,” Mr. Rodriguez explains. “Now our bill is $0, and we never worry about blackouts. The battery’s 6000+ cycle life means we won’t have to replace it for years, and the 10-year warranty gives us total peace of mind. Installing it was way easier than we thought it would be—we’re not handymen, and we pulled it off with the guide. This lithium ion battery didn’t just save us money; it gave us control over our home power.”
Why JM’s Lithium Ion Battery Is the Right Choice for US Homes
As a Dongguan battery factory with 10 years of building lithium and sodium ion batteries, we didn’t just design this split type lithium battery for any home—we designed it for US homes. We know the unique challenges you face: high electric bills, rolling blackouts, extreme weather, and the need for reliable backup power. That’s why our storage home energy battery is built to meet US safety standards (UL 9540/UL 1973) and work seamlessly with the solar inverters and power systems most US households use.
Here’s what else makes it the best lithium ion battery for your home:
- Flexible installation: Wall or floor mounted, no custom modifications needed.
- Long-lasting performance: 6000+ cycle life and a 10-year warranty—we stand behind our product.
- Smart monitoring: WiFi/Bluetooth and an LCD display let you track the battery from anywhere, anytime.
- Power for your whole home: 200A max charge/discharge current and 15.36KWH rated energy handle all your appliances and EVs.
- No-hassle setup: Plug-and-play design means DIY installers or electricians can get it up and running in hours, not days.
We’re a factory with a decade of experience, so we cut out the middleman and deliver a high-quality lithium ion battery at a fair price—no fancy branding, just reliable power for your home.
Wrapping Up: Installing Your Lithium Ion Battery Is Easier Than You Think
Home energy storage doesn’t have to be complicated. With JM’s split type lithium battery, how to put the battery into your home system is a simple, step-by-step process that anyone can follow—whether you’re a DIY enthusiast or you hire a professional. This lithium ion battery is built for everyday US families: it’s reliable, easy to use, and saves you money on your electric bill while giving you backup power when you need it most.
As a Dongguan factory with 10 years of lithium ion battery expertise, we’re proud to build a storage home energy battery that meets the highest global standards—and fits the unique needs of US households. Whether you’re in Florida prepping for hurricanes, California escaping rolling blackouts, or anywhere in between, our 51.2V300Ah split type lithium battery is the solution for solar energy storage and emergency backup power.
If you have any questions regarding the installation of the battery, please feel free to contact us. With just a phone call or an email, we can assist you. Moreover, our batteries come with a 10-year warranty, so you can rest assured that your lithium-ion battery is meticulously manufactured and designed to last for a long time.
Make the switch to reliable home energy storage today—your wallet (and your peace of mind) will thank you.
JM 51.2V300Ah Split Type Lithium Battery
Get a Free Quote Now
Why Choose JM Energy Tech
- 10+ Years Battery Factory
- Strict Quality Control Standards
- Direct Factory Price
- Reliable & Stable Performance
What happens if a lithium battery is not charged for a long time
What Is Optimized Battery Charging